Staring at dust and dirt buildup on your headphones is one thing. But, the buildup of oils, sweat, dirt and even dead skin cells can all have a big effect on audio quality and the health of your ears.
In this guide, we will explore how often you should clean your headphones, taking into consideration your usage habits and the specific type of headphones you own.
Discover the most effective cleaning methods for various headphone styles, and learn how to maintain optimal audio quality and hygiene. We will also discuss the potential risks and consequences of neglecting regular headphone cleaning, emphasizing the importance of this often-overlooked aspect of headphone maintenance.
- How Often You Should Clean Your Headphones
- Frequency of Cleaning Headphones: It’s All About the Activity
- How Often Should You Clean Your Earbuds?
- How Often Should You Clean Your AirPods?
- Signs That Your Headphones Need Cleaning
- Cleaning Tips for Headphones: A Step-by-Step Guide
- Why You Should Clean Your Headphones Regularly
- Conclusion
How Often You Should Clean Your Headphones
As someone who’s constantly using headphones, I’ve often wondered: how often should you clean your headphones? After all, they’re exposed to all sorts of conditions of use—sweat, salt, iodine, sea water, pool water, you name it. So, I decided to do some research and create a recommended headphone cleaning schedule for myself. And guess what? I’m sharing it with you!
Frequency of Cleaning Headphones: It’s All About the Activity
The first thing I learned is that the frequency of cleaning headphones depends on the type of activity you’re doing while wearing them.
Here’s a quick breakdown:
- Gym: If you’re like me and love to hit the gym with your headphones, you should clean them at least once a week. Sweat and bacteria can build up quickly, so a weekly cleaning is essential.
- Running: For those who prefer running outdoors, cleaning your headphones once a month should suffice. However, if you’re running in particularly dusty or dirty environments, you might want to clean them more often.
- Casual use: If you’re just using your headphones for everyday activities like commuting or listening to music at home, a monthly cleaning should be enough.
| Type of Headphones | Activity | Frequency of Use | Cleaning Frequency |
|---|---|---|---|
| Over-ear | Gym | 1h/d | Once a week |
| Over-ear | Gym | 4h/d | Every day |
| Over-ear | Running | 1h/d | Twice a month |
| Over-ear | Running | 4h/d | Every other day |
| Over-ear | Regular use | 1h/d | Once a month |
| Over-ear | Regular use | 4h/d | Every week |
| In-ear | Gym | 1h/d | Once a week |
| In-ear | Gym | 4h/d | Every day |
| In-ear | Running | 1h/d | Twice a month |
| In-ear | Running | 4h/d | Every 2 days |
| In-ear | Regular use | 1h/d | Once a month |
| In-ear | Regular use | 4h/d | Every week |
Factors such as personal hygiene, propensity to sweat, and environmental conditions can also affect the cleaning frequency.
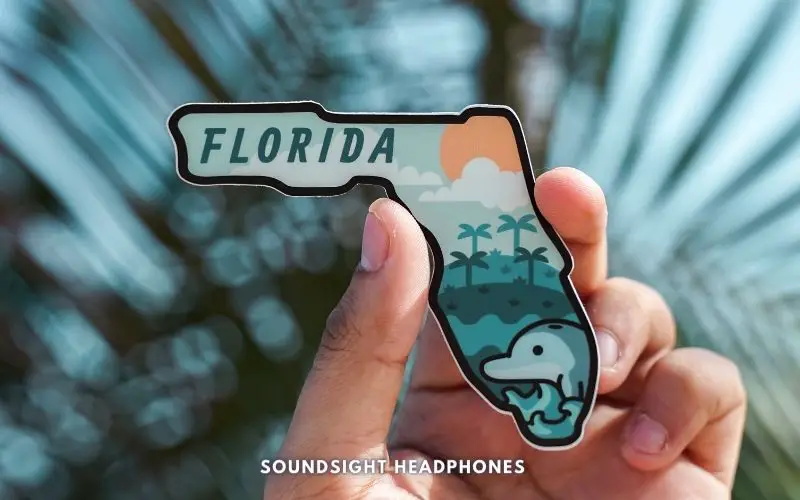
More humid areas like Texas and Florida, or ocean environments, may require more frequent cleaning due to increased moisture and potential for salt buildup. Sea air damage can damage your headphones and cause corrosion and rust on PCB boards and other electronic components.
People who sweat more or have oily skin may need to clean their headphones more frequently.
How Often Should You Clean Your Earbuds?
Earbuds, over-ear, and on-ear headphones each have unique cleaning needs due to their distinct designs and fits.
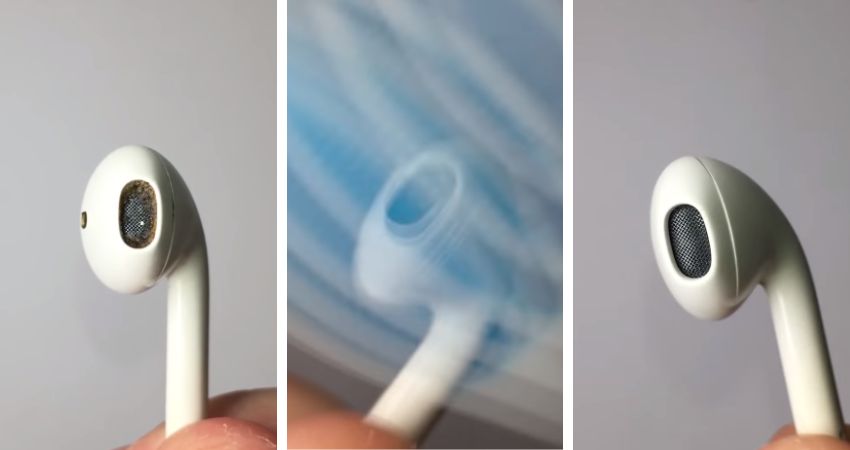
Earbuds are especially prone to earwax and bacteria accumulation as they sit directly in the ear canal, creating a warm, moist environment ideal for bacterial growth. Their compact design also makes thorough cleaning difficult.
For earbuds, the frequency of cleaning should be much higher. Earbuds are much more likely to accumulate ear wax and bacteria due to their unique design and fit. Because of this, we recommend cleaning your earbuds at least every other day.
In-ear headphones, which are inserted deeper into the ear canal, are even more susceptible to bacteria and debris buildup, increasing the risk of introducing pathogens into the ear.
If you're using your earbuds for activities like running or gym sessions, then you should clean them every day.
How Often Should You Clean Your AirPods?
AirPods—those sleek, wireless earbuds—require regular maintenance to ensure optimal performance and longevity.
It is imperative to clean your AirPods at least once a week or more frequently if exposed to sweat, dust, or other debris.
By diligently following these guidelines, you can:
- Preserve the pristine sound quality
- Prevent any potential damage caused by earwax or particulate buildup
- Extend the overall lifespan of your cherished audio accessory
To maintain your AirPods in tip-top condition, incorporate a thorough cleaning routine, especially after workouts or in dusty environments.
How to Clean Your AirPods and AirPods Pro
Cleaning your AirPods and AirPods Pro is a simple process that requires only a few household items.
Here’s a step-by-step guide on how to clean AirPods and keep them in excellent condition:
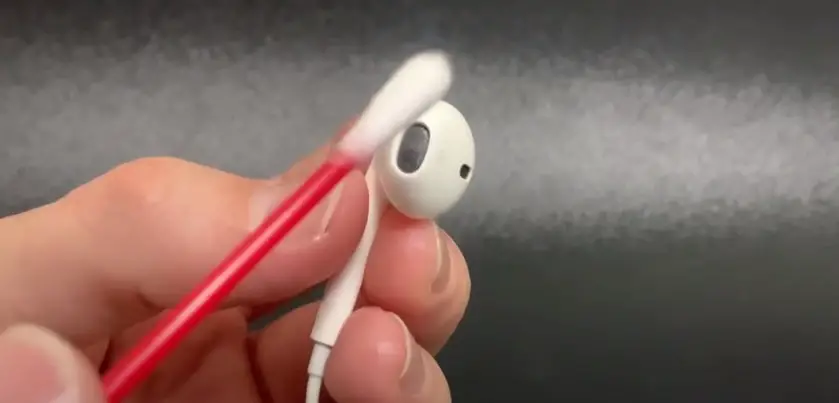
- Gather your cleaning supplies: a cotton swab, a lint-free cloth or microfiber cloth, and some isopropyl alcohol or rubbing alcohol.
- Gently wipe the exterior of your AirPods and AirPods Pro with the lint-free cloth or microfiber cloth to remove any dirt or debris.
- Moisten the cotton swab with a small amount of 70% isopropyl alcohol or rubbing alcohol. Be careful not to soak the swab, as too much liquid can damage your AirPods.
- Clean the speaker mesh and other crevices of your AirPods/AirPods Pro using the cotton swab soaked in alcohol. Remove any buildup of earwax, dirt, or debris.
- If necessary, use a dry cotton swab to absorb any excess water or alcohol from the speaker mesh and other areas.
- Let your AirPods fully air dry before use or place them back in their charging case, with mesh facing downward.
- To clean the charging case, wipe with a dry lint-free, or microfiber cloth, avoiding liquids or cleaning agents to prevent damage.
By regularly cleaning your AirPods and AirPods Pro, you can ensure they continue to provide the high-quality sound and performance you expect.
Remember always to handle your AirPods carefully and avoid exposing them to excessive moisture, harsh chemicals, and extreme temperatures, and don’t leave them in the sun or the car on a hot day. With proper care and maintenance, your investment will remain in good condition and last long.
Signs That Your Headphones Need Cleaning
Sometimes, it’s not just about following a routine. You should also be aware of the signs that your headphones need cleaning. Here are a few things to look out for:
- Decreased sound quality
- Unpleasant odors
- Visible dirt or grime
- Ear discomfort or irritation
If you notice any of these signs, it’s time to give your headphones a good cleaning!
Cleaning Tips for Headphones: A Step-by-Step Guide
Now that we know when to clean your headphones, let’s talk about how to clean headphones.
The importance of maintaining the quality and performance of our beloved headphones is paramount. Just as we fine-tune our audio systems, we must also pay attention to the cleanliness of our headphones.
Here’s a simple step-by-step guide to follow:
- Brush: Use a dry toothbrush to gently brush away any debris from the mesh side of your headphones, making sure to hold them with the mesh side facing downwards.
- Ear tips: If you’re using earbuds, remove the ear tips and clean them separately with a mixture of warm water and mild soap. Rinse thoroughly and let them air dry before reattaching them.
- Wipe: Regularly wipe the exterior of your headphones with a slightly damp cloth to remove any dirt or grime.
- Dry: Allow your headphones to air dry completely before using them again.
Cleaning Different Parts of Headphones
It’s also important to know how to clean specific parts of your headphones, such as:
- Cleaning ear cushions: Remove the cushions and gently clean them with a mixture of warm water and mild soap. Rinse thoroughly and let them air dry before reattaching them.
- Cleaning headphone cables: Wipe the cables with a slightly damp cloth, then dry them with a clean cloth.
- Cleaning headphone jack: Use a cotton swab dipped in rubbing alcohol to clean the headphone jack, then let it air dry.
- Cleaning headphone drivers: This should be done very occasionally and only if you’re experiencing sound issues. Do this only if hair or debris touching the driver causes popping or crackling sounds (This applies to IEMs and earbuds). If headphones keep popping, check our guide.
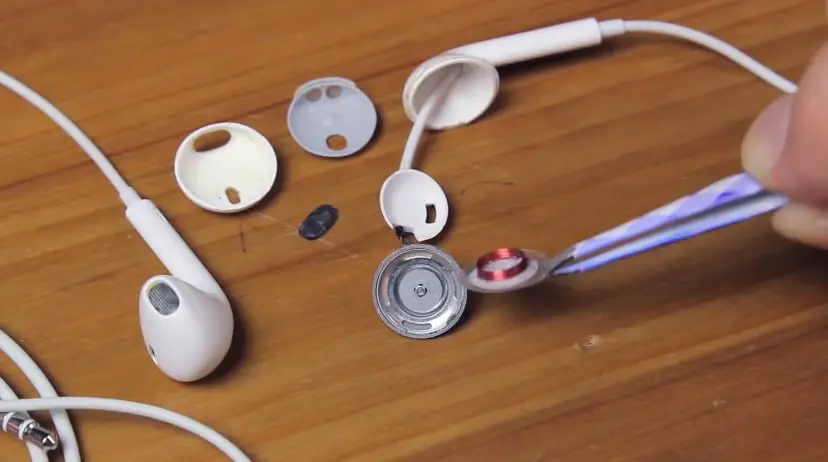
Apple EarPods Disassembly
Tools and Materials for Cleaning Headphones
Now that we know the importance of cleaning headphones, let’s talk about the tools and materials you’ll need to get the job done. Here’s a list of items I recommend having on hand:
Microfiber Cleaning Cloth
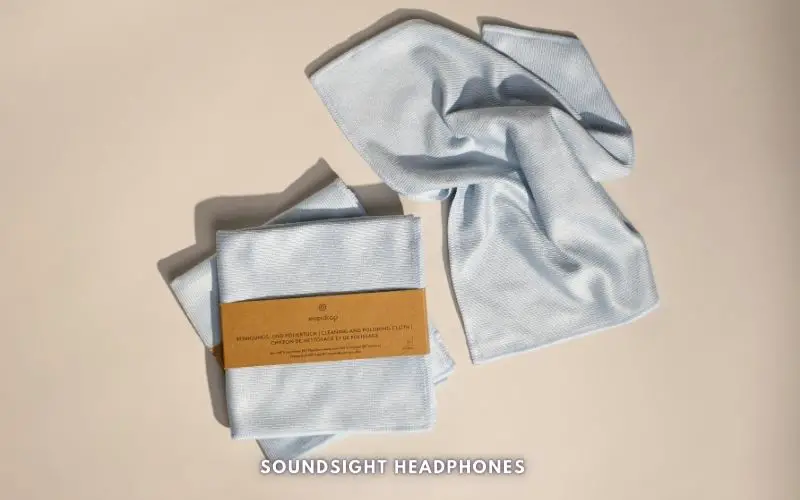
A microfiber cleaning cloth is a must-have for any headphone cleaning kit. These cloths are designed to pick up dirt, dust, and grime without leaving any scratches or residue behind.
Plus, they’re reusable and easy to clean, making them an eco-friendly choice. So, grab a plush microfiber cloth and give your headphones a good wipe down
Toothbrush
You might be wondering why a toothbrush is on this list, but trust me, it’s a game-changer.
A soft-bristle toothbrush is perfect for gently brushing away debris from the mesh side of your headphones without causing any damage.
Ensure you use a toothbrush that’s solely dedicated to cleaning your headphones and not the one you use for your teeth – that would be unhygienic!
Cotton Swabs
Cotton swabs are the unsung heroes of headphone cleaning. These little guys can reach all the nooks and crannies that your fingers can’t—perfect for cleaning headphone jacks, earbud crevices, and other hard-to-reach areas. Just be gentle when using cotton swabs to avoid pushing dirt further into your headphones.
Mild Soap
For cleaning ear tips and cushions, use a gentle, fragrance-free soap with warm water (preferably distilled water). Distilled water is recommended because it does not contain any minerals or impurities that can potentially harm the electronics.
Avoid harsh chemicals or abrasives to prevent damage. Gently clean with a soft cloth or sponge, rinse thoroughly, and air dry before reattaching to headphones.
Rubbing Alcohol
Sanitize headphones with rubbing alcohol to eliminate bacteria and germs. 70% isopropyl rubbing alcohol is effective in killing most bacteria and viruses on surfaces. It’s a much better disinfectant than 90% or 91% rubbing alcohol because the higher concentration evaporates too quickly to effectively kill germs.
Dampen a cotton swab or soft cloth and carefully wipe surfaces, focusing on skin-contact areas like ear cups and headband. Avoid mesh or speaker components to prevent damage.
Allow the headphones to air dry completely before using them again. And don’t keep them in the sun in the process.
Optional Cleaning Tools
While the fundamental tools and materials mentioned earlier should be adequate for the majority of headphone cleaning tasks, there are a few supplementary items that you might want to consider, much like adding an equalizer or amplifier to your audio setup:
- Air blower or canned air: These ingenious devices function as a high-pass filter for dust and dirt, effectively eradicating particles from hard-to-reach crevices that might otherwise compromise the pristine sound quality of your headphones.
- Cleaning gel: This remarkable substance can be thought of as a noise-cancellation system for obstinate grime—obliterating unwanted buildup and ensuring a spotless listening experience.
- UV sanitizer: Some earbuds boast a UV charging case, which acts as a built-in antimicrobial agent—diminishing bacterial growth and maintaining a hygienic listening environment.
- Hydrogen peroxide: This potent chemical can be employed to clean and sanitize earbuds, but use sparingly to avoid inflicting damage upon your headphones.
The Importance of Ear Hygiene: Why You Should Clean Your Headphones Regularly
You might be wondering, “why should I clean my headphones?” Well, let me tell you—ear hygiene is crucial for maintaining good health and preventing ear infections.
Here are a few reasons why cleaning your headphones is essential:
- Bacteria buildup: Our ears naturally produce earwax to protect and lubricate the ear canal. However, when you use headphones, this earwax can transfer onto the earbuds, creating a breeding ground for bacteria, increasing the chance for ear infection.
- Ear debris: Apart from earwax, your headphones can also collect other ear debris like dead skin cells, sweat, and dirt. This can lead to discomfort and even infections if not cleaned regularly.
- Sound quality: Dirty headphones negatively impact the sound quality; thus, regular cleaning ensures that you get the best listening experience possible.
Conclusion
So, there you have it! A complete guide on how often to clean headphones and the best practices for doing so. Now, go forth and enjoy your clean, fresh-sounding headphones!