Have you ever been puzzled by the whimsical world of audio, wondering why are my headphones only working in one ear?
You’re not alone; many people have faced the same issue, asking themselves: why is only one of my earbuds working? This comprehensive guide will unravel the mystery behind this frustrating problem and provide practical solutions on how to fix headphones when only one side works.
Whether your headphones are damaged, have wiring issues, or need to adjust the audio, we’ve got you covered with the following:
- Identifying common causes for headphones where one side doesn’t work
- Step-by-step instructions to get your headphones on both sides working again on PC, Android, iPhone, and other audio sources
- How to fix Bluetooth headphones that only work in one ear
- Reasons why some headphones only work in certain conditions
- Tips for extending wired earphone’s lifespan
With that said, let’s not beat around the bush and dive right into solving your headphone issues!
Reasons Why Headphones Only Work in One Ear
The reasons headphones only work in one ear are mostly related to the following:
- Broken headphone jack: If the audio jack is bent, broken, or a pin is disconnected, the plug doesn’t create proper contact with your device’s audio port, resulting in sound only coming through one headphone.
- Frayed or damaged wire: Wires rubbing against each other can result in connection faults and audio disruption over time.
- Short circuit: This normally occurs when the insulation of two wires in your headphone cable wears out, and the two wires make contact, creating an alternate electrical path that disrupts the flow of electricity.
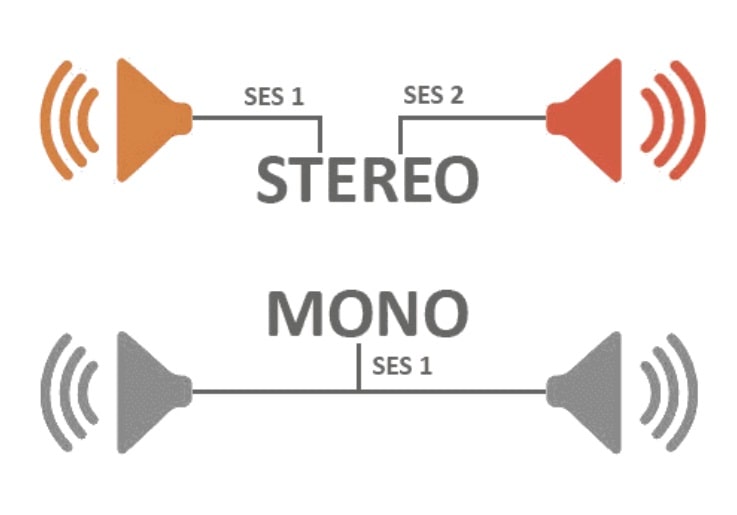
- Mono mode: A setting that sends the same signal to both left and right channels or plays music in just one ear.
See the pattern? Connection and wire issues are the most common culprits in headphones that only work in one side. However, other reasons could include:
- Debris/dust in the socket: Poor physical contact between the headphone jack and the audio port can cause one-sided audio. Cleaning the socket with a small brush or compressed air can help remove any debris or dust.
- Worn-out audio port: Easy to troubleshoot (your headphones work fine with other audio devices) but tough to solve if cleaning the socket doesn’t fix the issue.
- Damaged sound membrane: This is a less common issue, but it can happen if the diaphragm or sound membrane inside the headphone speaker gets damaged due to excessive volume, physical impact, wear, and tear, or an object piercing it. A damaged sound membrane can cause a buzzing or rattling noise, distortion, or loss of sound quality in one or both ear cups.
- Unbalanced headphones (left or right channel is muted): Sometimes, headphones only play sound on one side due to an unbalanced audio setting (one channel has volume while the other one has 0 volume).
- Broken plug tip stuck in the audio jack: Sometimes, the tip of the headphone plug can break off and get stuck inside the audio jack, preventing proper contact with your headphones. You can try to remove the broken piece.
- Wireless interference in true wireless headphones or water damage.
How to Troubleshoot and Fix Headphones Only Working in One Ear
Now that we’ve established what causes headphones to behave inconsistently between the two speakers let’s swift through some quick solutions for fixing headphones that only function on one side.
Here are the issues that we’ll address:
- Faulty wiring
- Damaged or blown speaker
- Contamination of the membrane
- Frayed and damaged cable
- Faulty audio output
- Audio imbalance caused by Mono mode
- Removing a broken headphone jack
However, before starting off, run Windows Audio Troubleshooter if you’re on Windows to see if that fixes the issue before proceeding with the other steps.
Diagnosing Wiring Issues: Checking Resistance and Identifying Driver Damage
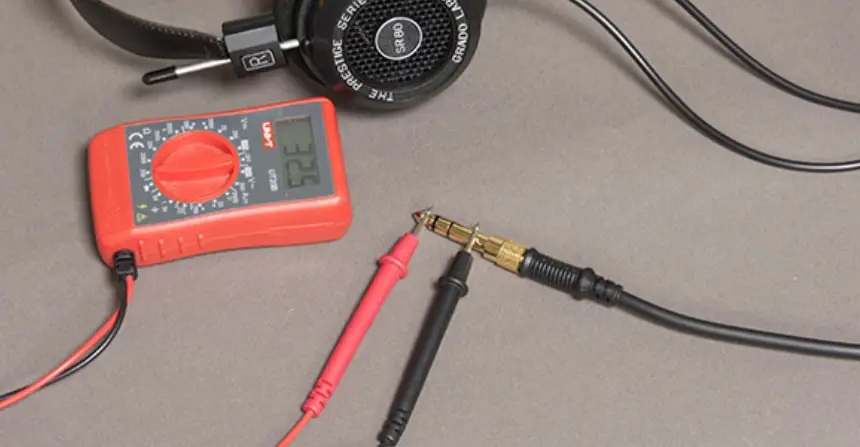
To diagnose wiring issue, check the resistance between the ground contact and the left and right terminals with a multimeter.
The initial check is carried out by the multimeter:
- Set the mode switch of the device to measure resistance with a limit of 200 ohms. (Large headphones have a voice coil winding resistance of 120-150 ohms, while headphones for smartphones and players have 16-50 ohms.)
- Measure the voice coil resistance between the ground contact of the plug and the terminals of the right and left channels.
The resistance of both drivers should be what’s specified in the technical sheet. However, you must account for the relationship between frequency and speaker impedance.
A damaged driver may account for a significant discrepancy in resistance (more than 5/10%). In contrast, a blown driver will show open (infinite) resistance. If you suspect that your headphones are experiencing distorted audio, learn how to fix distorted audio in headphones for more information on troubleshooting this issue.
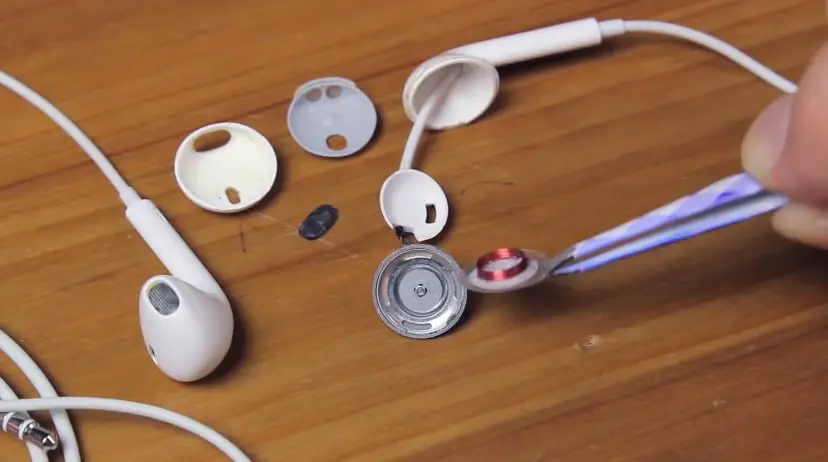
Replacing a Blown Speaker
If your headset driver is damaged, the solution is to replace the speaker.
To replace a blown driver, you need the following tools:
- Small screwdriver
- Replacement headphone driver
- Soldering iron
- Solder
- Adhesive or glue (optional).
Here are the steps to do so:
- Disassemble the headphones. Carefully remove the ear pads; look for screws, and use a small screwdriver to open the earpiece.
- Remove the old driver by desoldering or cutting its wires from the base (leave enough wire to solder the new driver later). Also, remember which wire is connected to which terminal). Unscrew any screws or remove any adhesive holding it in place.
- Order an OEM headphone driver replacement in the correct size and impedance for your specific headphones (check the headphone model technical specifications). Email the headphone manufacturer or check this list for headphone replacement parts:
- Install the new driver by placing it into its place and securing it with screws or adhesive. Solder the wires according to the correct polarity.
- Reassemble the headphones by putting back any ear pads or protective cover.
Exercise caution during this procedure since any error could aggravate the problem or further damage the headphones.
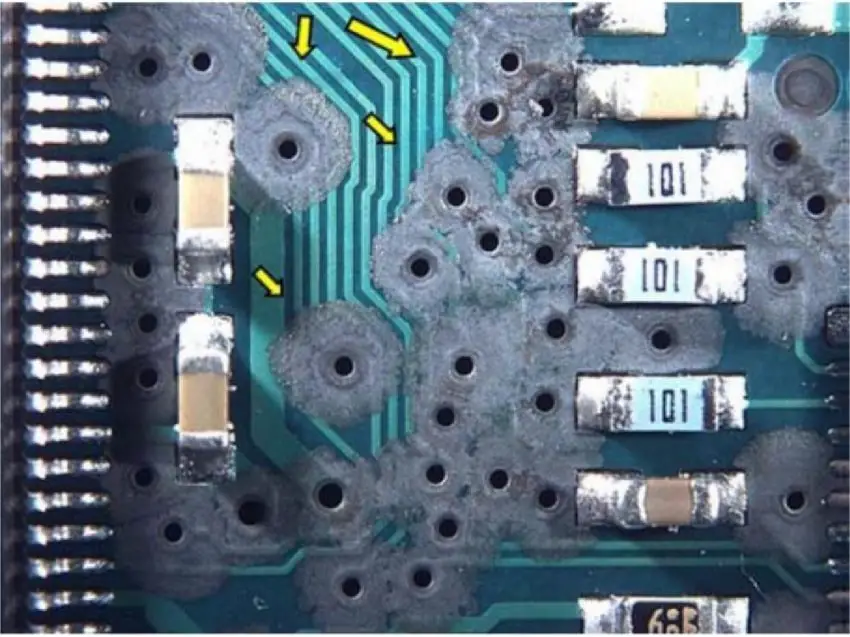
Clean Your Headphone Drivers and Prevent Contamination
If there is no open circuit or blown drivers, but one earpiece is still not functioning, contamination or debris potentially blocking the membrane’s movement may be to blame.
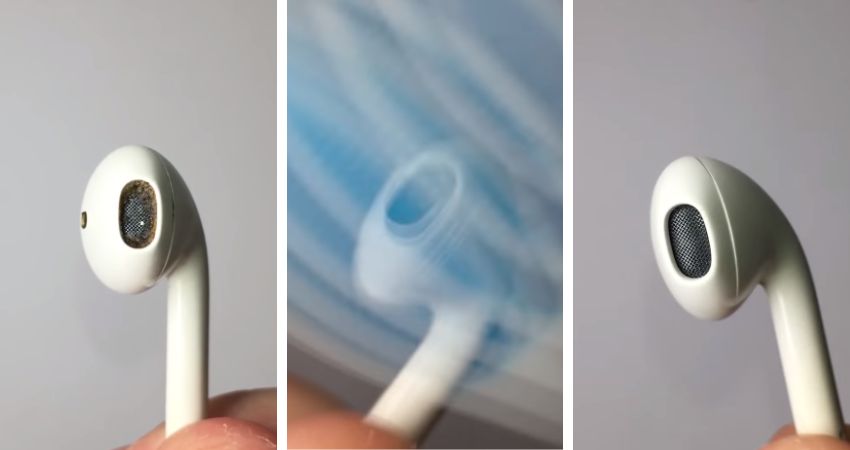
It is fairly common for headphones to only work in one ear due to accumulated debris and dust. In this case, it’s best to disassemble and clean your headphones drivers using a tweezer, soft brush, or cotton swab dampened in 70% isopropyl alcohol.
Antibacterial wipes can then be used to clean the earpiece and prevent future contamination.
Note: Before attempting any DIY repairs, verify that the headphones are out of warranty or you risk voiding it.
Repairing Headphone Cable
If you have identified a wiring issue causing your headphones to play music through one ear only, you can attempt to fix the issue yourself.
Here’s how to repair a cable properly:
- Tools you will need:
- A soldering iron
- Solder
- Electrical tape or heat shrink tubing
- Wire strippers
- A lighter or heat gun.
- Expose the wires: Carefully cut open the insulation around the faulty area to expose the wires.
- Identify and strip damaged wires: Locate the damaged wire(s) and use wire strippers to remove about 1 cm of insulation from each end of the broken wire.
- Slide on heat shrink tubing: Cut a piece of heat shrink tubing that is slightly longer than the exposed wire section and slide it onto the wire.
- Solder wires together: Twist together both ends of each exposed wire and apply solder using your soldering iron until they are securely connected.
- Cover with heat shrink tubing: Slide your previously placed heat shrink tubing over your newly-soldered connection so that it covers both sides evenly.
- Shrink tubing with lighter or heat gun: Apply gentle heat from either a lighter or a low-setting on your heat gun until it shrinks tightly around your repaired connection.
To ensure a successful repair of your headphone cable, there are several vital steps to avoid, such as: overheating the solder, making poor wire connections, using too much or too little solder, not using heat shrink tubing or electrical tape, rushing the process, and ignoring safety precautions.
Remember critical precautions like these when handling a headphone cable repair!
Broken Headphone Wire Near Jack
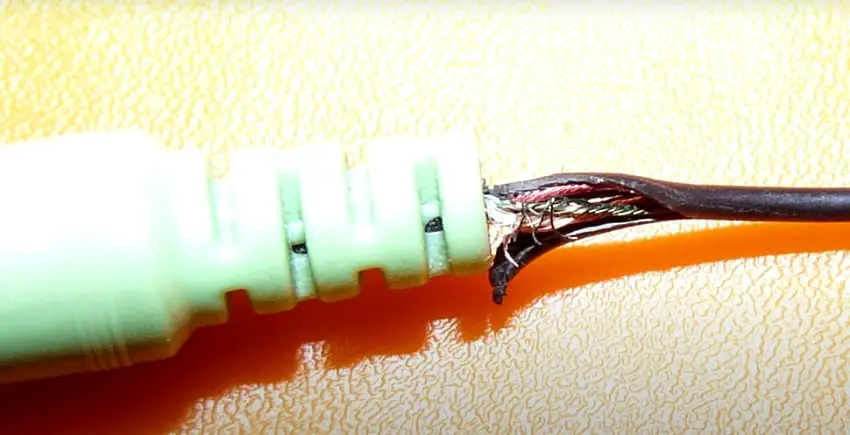
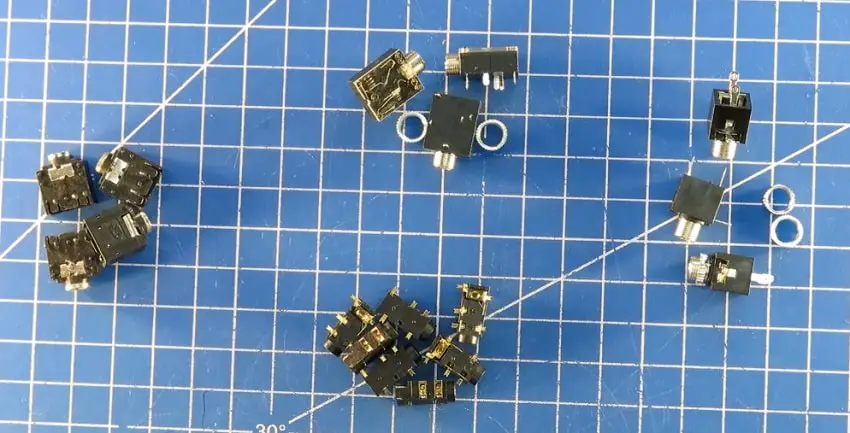
Another method to repair a broken headphone cable is using a 3.5mm audio jack replacement. This works best when the issue is near the headphone jack itself.
Here are the steps to repair your broken headphone jack:
- Tools you will need:
- A 3.5mm audio jack replacement
- A soldering iron
- Solder
- Wire strippers
- Cut off the damaged connector: Using wire cutters, snip off the existing headphone jack.
- Strip the cable: Use wire strippers to remove about 2 cm of insulation from the end of the cable, exposing the inner wires.
- Identify and strip inner wires: Inside the cable, you should see three or four colored wires (usually red, green/blue, and copper). Strip about 1 cm of insulation from each wire (don’t forget to twist wires).
- Prepare the new audio jack: Unscrew and disassemble your new 3.5mm audio jack to expose its terminals for soldering.
- Solder wires to new audio jack terminals: Solder each stripped wire to its corresponding terminal on your new audio jack (red = right channel; green/blue = left channel; copper = ground).
- Test: Once all connections are secure and the new audio jack is tightly in place, you can plug your headphones into an MP3 Player or smartphone
- Take a deep breath and let out a “sigh of relief.“
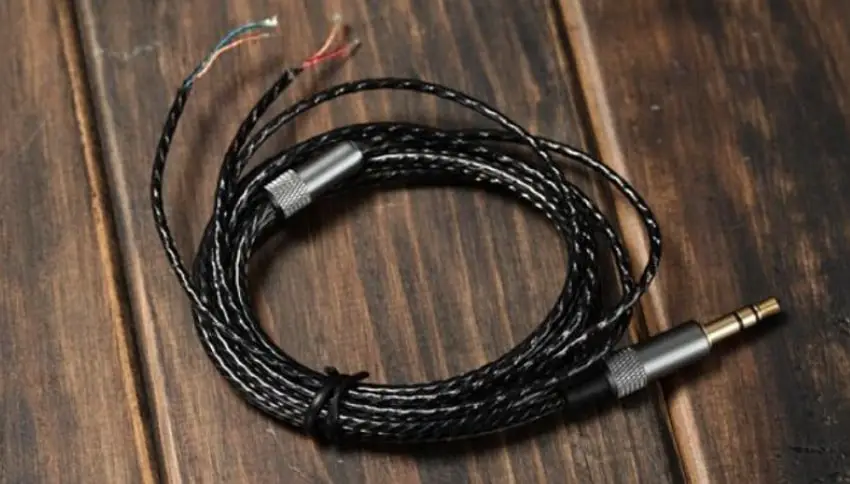
If you face issues like this reddit user, switch the to a DIY braided cable since thin headphone cables are likely to break again.
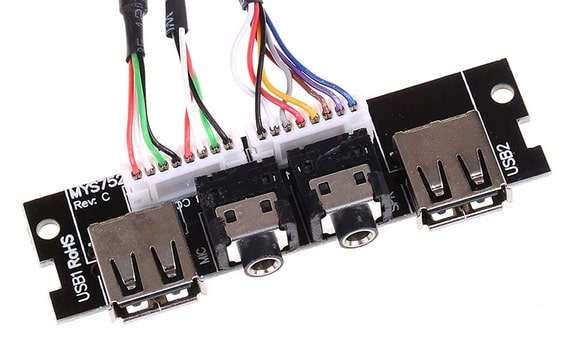
Repairing a Faulty Audio Output
Your smartphone’s audio port, or PC’s PCB front channel audio port may be damaged or not working properly. Test headphones on another device or switch to the motherboard’s rear audio port so that you eliminate the possibility of a device issue.
Depending on the issue and device, here are the steps:
The biggest challenge with smartphones causing only one headphone to work is the need for a new audio headphone jack. Thus, with smartphones, you either take them to a professional repair service to replace the damaged audio port, or consider using Bluetooth headphones or a USB-C/Lightning to 3.5mm adapter (depending on your smartphone’s compatibility) as an alternative solution.
On PC, you can fix the audio jack alone or replace the PCB front channel audio port with a new one. Similarly, you can use a USB stereo adapter, a USB to 3.5 mm jack audio adapter, or use an external USB sound card as an alternative.
As with smartphones, it is best to get a technician or professional to repair the headphone socket on a laptop.
Disable Mono Mode
Some earbuds, like Indy True Wireless Earbuds, can only use the right earbud in Mono Mode as this is the primary earbud.
If you are using earbuds and the sound is only coming from one side, check the sound settings in your headset application to ensure they are not in Mono Mode.
To make sure your earbuds don’t operate in Mono mode, go through the following steps:
On PC
- Search for “Mono Audio”
- Select “Turn mono audio on or off”
- If the option “On” appears under “Turn on mono audio”, it indicates you are in Mono Mode. Switch the toggle to “Off” to make sure this mode isn’t active.
Android
Disabling Mono audio in Android devices depends on device:
- Open the “Settings” app
- Scroll down and tap on:
- Accessibility and then Hearing on Samsung Galaxy devices
- Accessibility; then look under the “Audio & on-screen text” section
- Tap on Mono audio to switch it off.
Mac
- Open “System Preferences“
- Click on the “Accessibility” icon
- Select “Audio” from the left sidebar
- If the checkbox next to “Play stereo audio as mono” is checked, uncheck it to enable stereo sound and disable mono mode.
iPhone
- Head to “Settings” and then “Accessibility“
- Tap on “Audio/Visual” and disable Mono Audio.
Removing a Broken Headphone Jack
Here’s how you remove a broken aux tip from your phone or tablet to fix headphones that only work in one ear:
Super Glue Method
- Apply a small amount of Gorilla super glue to the end of a toothpick or matchstick.
- Carefully insert the glued end into the broken headphone jack, ensuring it only touches the broken piece.
- Hold it in place for about 30 seconds, allowing the glue to bond with the broken piece (some people leave it for hours though it’s not necessary).
- Gently pull out the toothpick or matchstick and remove the broken piece with it.
Bic Pen Method
- Remove the ink tube from a Bic pen, leaving just an empty pen tube.
- Insert one end of this pen tube into your phone or tablet’s headphone jack until it grips onto the broken aux tip.
- Gently twist and pull on this pen tube to remove the broken piece.
Note: Be cautious when using both methods. And unplug all power sources from your device. Also, try applying glue on the inside of the pen tube with a toothpick and then push it into the broken aux tip to extract it.
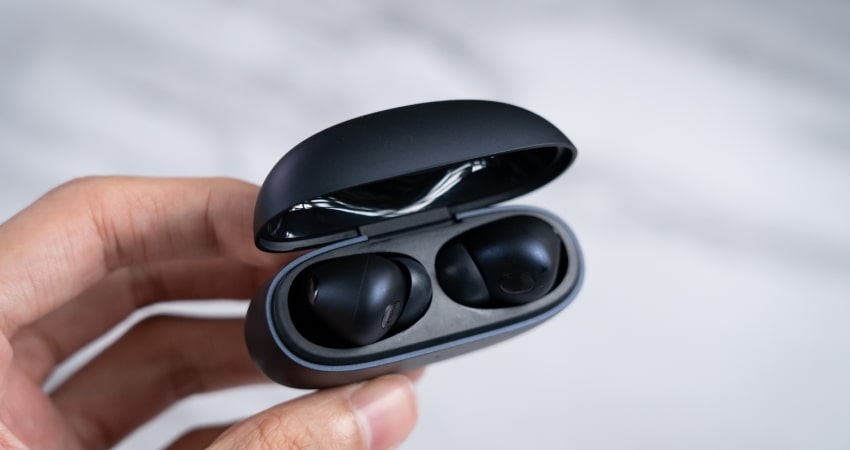
Why Bluetooth Headphones Only Work in One Ear & How to Fix It
Bluetooth headphones may only work in one ear due to several reasons, including
Electronic component failures or corrosion can cause wireless earbuds to only work in one ear. Water exposure can damage the headphones and affect how the earbuds operate.
Most TWS have a primary and secondary earbud (right and left). The primary earbud communicates with the audio device and broadcasts the signal to the secondary earbud (or not, in our case).
If the primary earbud is damaged or not functioning properly, it can cause the secondary earbud not to receive any audio signal.
The Bluetooth signal may be interrupted by internal damage caused by excessive humidity, chemical contamination, or corrosive substances. Thus, various factors can impede the audio signal from reaching one of the earbuds and even cause Bluetooth headphones to sound staticy.
Another reason why Bluetooth headphones only work in one ear because of connectivity issues. Sometimes, the Bluetooth connection between the headphones and audio device is unstable, causing one of the earbuds to keep disconnecting.
Using Mono Mode can also disable playback in the left earpiece and render it useless, making it appear damaged or disconnected. Additionally, an audio malfunction could arise and cause one of the earbuds to become stuck in mono mode.

Ways to Make Both Earbuds Work Flawlessly
Bluetooth headphones offer a seamless audio experience—but when one ear fails to work or connect, the user experience begins to suffer.
Let’s investigate ways to restore your wireless earbuds to their former glory.
Improve Signal Stability
Enhance your listening experience by minimizing obstacles that may disrupt the connection between your earbuds and the device. Some effective ways to achieve this are:
- Keep your device and earbuds within proximity.
- Avoid using multiple Bluetooth devices simultaneously.
- Steer clear of electronic appliances that emit strong electromagnetic waves.
Performing these steps can also fix the random Bluetooth headphones beeping sounds.
Restart the Earbuds
A simple factory reset can sometimes resolve any minor glitches or connectivity issues. To do this, follow these steps:
- Turn off both earbuds.
- Wait for a few seconds before turning them back on.
- Reconnect them to your device and check if both are working correctly.
- Sometimes placing them in their charging case and then taking them out can reset or restart your earbuds.
Fix Water-Damaged Headphones
If you suspect that moisture is causing one or both of your earbuds to malfunction, we have an article on how to fix water-damaged headphone that you can check., though the steps are as follows:
- Remove chemicals: Dilute the water inside with distilled water, then shake to remove excess water.
- Dry them out: Wipe off droplets, dirt, oils, and sweat with a towel, soft cloth, or microfiber cloth.
- Use silica gel packets: Store headphones in an airtight container with silica gel or uncooked rice.
What to Do When Your Left or Right AirPod Isn’t Working
If your left or right AirPod isn’t working, do the following:
- Check for debris: Inspect your AirPods for any dirt or debris that might be blocking the speaker grills. Gently clean them with a soft, dry, lint-free cloth.
- Check audio settings: Ensure that the audio balance is set correctly on your device. Go to Settings > Accessibility > Audio/Visual (for iOS) or Audio adjustment (for Android) and adjust the slider accordingly.
- Reset your AirPods: Disconnect from all devices via Bluetooth Settings. Tap on “Forget This Device.” Press and hold the setup button on the back of the charging case for approximately 15 seconds until the status light flashes white. Wait for AirPods to reconnect; when the light turns amber, they’re ready for use.
Why Headphones Only Work in Certain Conditions
Fulfilling and constant sound quality is usually expected from headphones, yet yours needs to deliver. So, what could be causing your headphones to only work in certain conditions?
It may well be the following:
- Corroded, loosened, or dirty headphone jack or audio port due to water, salt, sweat, or chemicals.
- Broken, kinked, or worn wire.
- One earbuds battery is drained or defective.
- Reduced electrical conductivity due to impurities, strain, or temperature.
Simply put, what causes headphones to only work in one ear is mainly wiring issues. Ensuring that connections, wiring, and jacks are in good condition and fixing any broken ones should get your headphones working as normal.
Tips to Extend the Life of Wired Earphones
Wired earphones are a visceral part of our daily lives, and knowing how to care for them is essential. Here are some tips to extend the life of your wired earphones:
How to Manage Wired Headphones

- Avoid tangling: Always wrap your earphones in a figure-eight pattern (the Use the “over-under” technique). This prevents knots and tangles, which can damage the wires.
- Take care with cords: Never pull on the earphone cords harshly. This can cause stress on the wires, leading to fraying or breakage or breaking the connection between the cord and the plug.
- Use a case: Invest in a waterproof hard case for your earphones when not in use. This will shield them from dirt, moisture, and physical damage.
How to Store Earphones
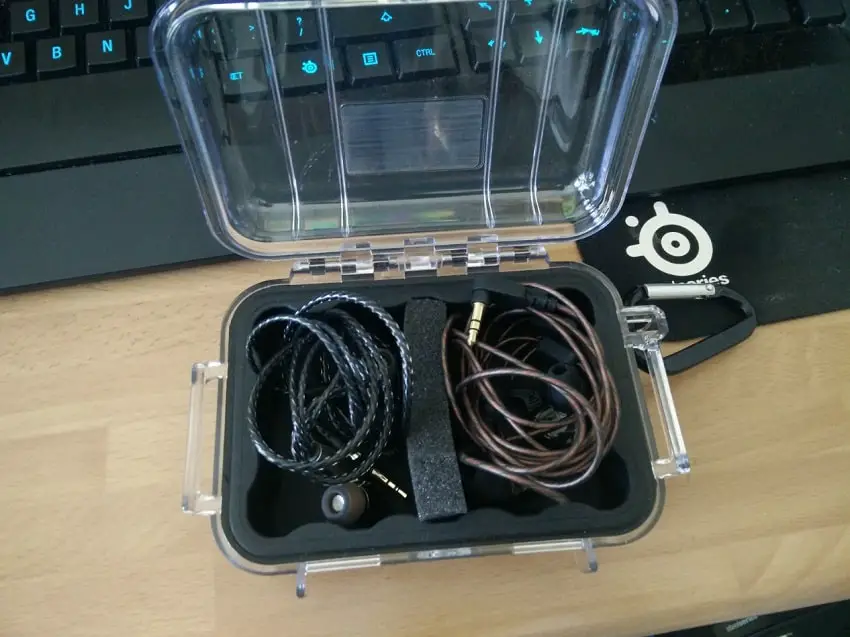
Proper storage is crucial in extending the life of your earbuds, so follow these tips:
- Clean before storage: Make sure to clean your earphones prior to storage. Use a damp cloth or Lysol wipe over the wires and casing.
- Keep away from UV and moisture: Store your wired earphones in a cool, dry place away from direct sunlight or damp environments.
- Secure the jack: When storing your earphone’s jack, ensure it is not bent or twisted, as this can cause internal wire damage.
The Do’s and Don’ts of How to Take Care of Your Wired Earphones
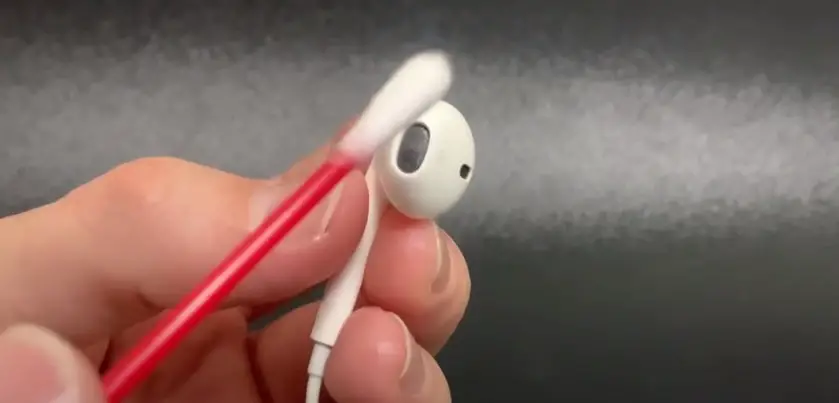
- Do clean your earbuds regularly with a cotton swab and 70% isopropyl alcohol or alcohol wipes.
- Do unplug your headphones when not in use; this prevents unnecessary wear on both the plug and socket.
- Don’t yank on the cord when unplugging; instead, gently grasp the plug.
- Don’t expose them to moisture (e.g., don’t wear them during workouts).
- Don’t sleep with your earphones on.
- Refrain from sharing with others due to hygiene concerns.
Tips for Earphone Longevity
- Reduce the volume: Listening at visceral volumes harms your ears and strains the speakers in your earbuds. Keep the volume at a reasonable level.
- Avoid extreme temperatures: Excessive heat or cold can affect the materials used in your earbuds, causing them to degrade over time.
Note: Purchasing an extended warranty for your headphones (and electronics in general) is worthwhile if you live in high-humidity states such as Hawaii or Florida.
By following these tips to extend the life of wired headphones, you can enjoy high-quality audio for longer periods without constantly replacing them due to constant wear and tear.
Conclusion
Headphones may only work in one ear due to various idiosyncrasies and shortcomings, such as a damaged audio jack, broken wires, or device settings issues. But there are ways to overcome this adversity. Sometimes all it takes is to run the Windows audio troubleshooter or clean the audio jack or audio port so that the connection is established properly.